Custom Checkout Page WooCommerce Setup Guide
Build a custom checkout page WooCommerce store owners love. Learn to use a woocommerce checkout field editor, shortcode hacks, and how to customize
You spent three weeks optimizing product images, tweaking your pricing strategy, and finally got that guest blogger to link to your category pages. Then a customer clicks 'Add to Cart', breezes through the cart, and hits the checkout wall. Suddenly, they are staring at fourteen required fields they do not need to fill out, including a state dropdown that does not contain their territory. They close the tab. You just lost a sale because your checkout process is rigid, cluttered, and unoptimized.
Building a custom checkout page WooCommerce store owners can actually use is not about making it look pretty; it is about removing every unnecessary obstacle between the cart and the payment gateway. Whether you are managing a high-volume fashion brand or a niche B2B supplier, the checkout page is the single most critical conversion point in your entire funnel. In this guide, we will walk through the exact methods to strip down, rebuild, and optimize your checkout flow using both code and specialized tools.
Why the Default Checkout Page Fails Modern Stores
WooCommerce ships with a generic checkout template designed to satisfy the widest possible range of merchants. That means it includes billing address, shipping address, order notes, company name, and various phone fields, most of which are often irrelevant to your specific business model. When a customer sees unnecessary form fields, cognitive load increases, and abandonment rates spike.
Consider a digital download store selling PDF guides. Why does that store need a shipping address section? Or a subscription box service that requires a specific delivery date? The default template cannot handle these nuances without significant modification. Leaving the checkout page untouched is effectively leaving money on the table. You need a streamlined interface that asks for exactly what you need, nothing more.
Methods to Customize Your Checkout Flow
There are three distinct approaches to modifying the checkout experience, ranging from zero-code solutions to hard-coded overrides. Your choice depends entirely on your technical comfort level and how frequently you need to tweak the layout.
Using a Dedicated WooCommerce Checkout Field Editor
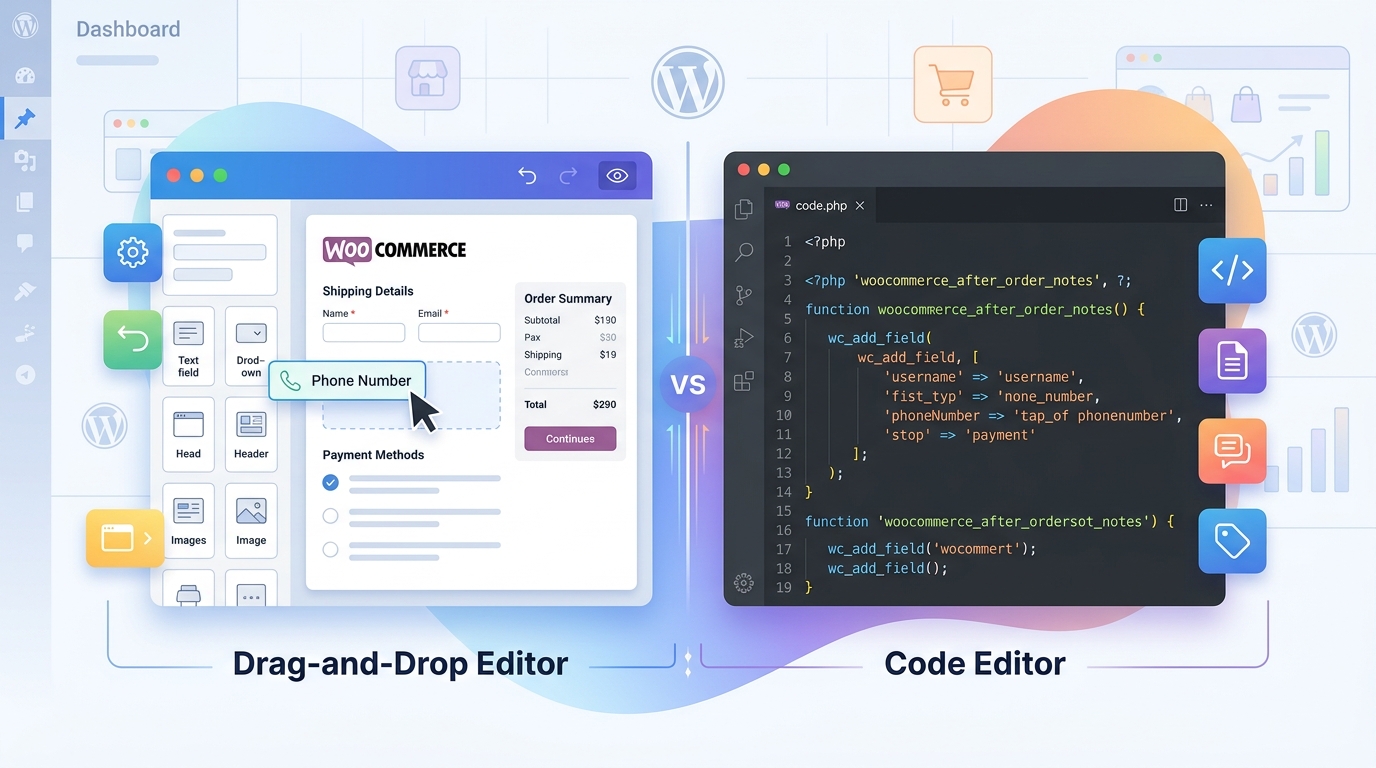
The most efficient path for 90% of store owners is using a dedicated woocommerce checkout field editor plugin. This approach allows you to add, remove, rename, and reorder fields directly from the WordPress admin dashboard without touching a single line of PHP.
For example, if you are running a B2B wholesale operation, you might need to capture a VAT number or a purchase order reference. A field editor allows you to insert these fields conditionally. You can set rules so that the VAT field only appears when the customer selects 'Business' as the account type. This keeps the interface clean for retail buyers while capturing necessary compliance data from corporate clients. Tools like Checkout Fields Manager for WooCommerce provide this granular control, allowing you to toggle fields on and off based on product categories, user roles, or cart totals.
Understanding the WooCommerce Checkout Shortcode
Advanced users and developers often look for a woocommerce checkout shortcode to embed the checkout form into custom page templates or third-party page builders. While WooCommerce historically used a specific shortcode to render the checkout, the modern approach relies on the `[woocommerce_checkout]` shortcode.
However, relying solely on shortcodes has limitations. The checkout page requires specific session handling, cart validation, and nonce security checks that generic page builders often break. If you paste the checkout shortcode into a standard Elementor or Divi page without proper configuration, you will frequently encounter the 'Cart is empty' error or broken AJAX updates. The shortcode is best used when you are building a completely custom theme and need to inject the checkout logic into a non-standard layout structure, provided you handle the WooCommerce session initialization correctly in your theme's `functions.php` file.

How to Customize WooCommerce Checkout Page Without Plugin
Sometimes you cannot install another plugin due to hosting restrictions or a strict performance budget. In these cases, you must learn how to customize woocommerce checkout page without plugin. This requires hooking into WooCommerce's action and filter system.
To remove a field, you use the `woocommerce_checkout_fields` filter. Here is a concrete example of how to strip out the 'Company Name' and 'Second Address Line' fields programmatically:
```php add_filter( 'woocommerce_checkout_fields', 'my_custom_checkout_fields_removal' ); function my_custom_checkout_fields_removal( $fields ) { unset( $fields['billing']['billing_company'] ); unset( $fields['billing']['billing_address_2'] ); unset( $fields['shipping']['shipping_address_2'] ); return $fields; } ```
To add a field, you modify the `$fields` array structure. If you need to add a custom 'Delivery Instructions' text area, you would append it like this:
```php $fields['billing']['billing_delivery_notes'] = array( 'type' => 'textarea', 'label' => __('Delivery Instructions', 'woocommerce'), 'placeholder' => _x('e.g. Leave at the front gate', 'placeholder', 'woocommerce'), 'required' => false, 'class' => array('form-row-wide'), 'priority' => 90, ); ```
While this method is lightweight, it is fragile. If WooCommerce updates its core field structure in a future major release, your hardcoded removals might throw PHP warnings or fail to hide the intended fields. Always wrap your code in version checks or use a child theme to prevent updates from overwriting your work.
Advanced Field Logic and Conditional Requirements
Once you have the basic fields under control, the real optimization happens with conditional logic. A static checkout form is rarely optimal. You should be dynamically showing or hiding fields based on user input to keep the form as short as possible.
Handling Shipping vs. Billing Discrepancies
By default, WooCommerce shows a checkbox that says 'Ship to a different address?'. For many stores, this is redundant noise. If you sell digital products, you should hide this checkbox entirely and force the billing address to be the only address collected. Conversely, if you are a gift shop, you might want to force the 'Ship to a different address' section to be expanded by default, saving the customer a click.
Date and Time Sensitivity
If your business relies on physical delivery, the checkout page is the perfect place to capture logistics data. Instead of relying on vague 'Order Notes', you can integrate a dedicated date picker. Using a tool like Delivery Date & Timeslot for WooCommerce, you can embed a calendar directly into the checkout flow, forcing the customer to select a delivery window before they can proceed to payment. This reduces support tickets regarding missed deliveries and manages customer expectations upfront.
Comparison: Plugin vs. Code Approaches
Choosing the right method depends on your resources. Here is a breakdown of the trade-offs between using a dedicated field manager and writing custom code.
| Feature | Field Editor Plugin | Custom Code (functions.php) |
|---|---|---|
| Setup Time | 5 minutes via UI | 30+ minutes coding & testing |
| Maintenance | Auto-updates with plugin | Manual updates required |
| Risk of Breakage | Low (sandboxed) | High (theme updates can break hooks) |
| Conditional Logic | Visual rule builders | Complex PHP `if/else` statements |
| Performance | Slight overhead (negligible) | Zero overhead (native PHP) |
| Best For | Store owners, Agencies | Developers, High-performance needs |
Monetizing the Checkout Experience
Optimization is not just about removing fields; it is also about adding value. The checkout page is a high-intent environment. Customers are already committed to buying; this is the perfect moment to offer relevant add-ons or upsells.
Freemium and Membership Models
If you are running a membership site or offering tiered access to content, the standard checkout flow falls short. You need a system that can handle user registration, role assignment, and payment processing in a single step. Integrating a solution like Checkout for Freemius allows you to streamline the licensing and subscription checkout process, ensuring that users are immediately granted access to their purchased content upon successful payment. This removes the friction of separate registration pages and login walls.
Strategic Upsells
You can also use the checkout area to promote related services. If a customer is buying a camera, showing a protective case or an extended warranty option right before the 'Place Order' button can significantly increase your average order value (AOV). However, these upsells must be subtle. A modal popup that blocks the checkout flow is intrusive and will hurt conversion rates. Inline suggestions that sit naturally within the order summary are far more effective.
Troubleshooting Common Checkout Issues
Even with a perfectly configured custom checkout page, issues will arise. Here are the most common pitfalls and how to fix them.
The White Screen of Death After Editing Functions.php
If you are customizing your checkout via code and encounter a white screen, you have likely introduced a syntax error in your PHP. Common mistakes include missing semicolons, unclosed brackets, or conflicting function names. Always enable `WP_DEBUG` in your `wp-config.php` file to see the exact error line. If you are locked out of your admin, access your site via FTP and rename the active theme folder to force WordPress to revert to a default theme, allowing you to log in and fix the code.
AJAX Cart Fragments Breaking
WooCommerce relies on AJAX to update cart totals and validate checkout fields without reloading the page. If you are using a page builder or a custom theme, you might accidentally dequeue the necessary scripts. Ensure that `wc-cart-fragments` and `wc-checkout` scripts are enqueued on your checkout page. If the 'Place Order' button spins indefinitely, check your browser console for JavaScript errors that might be blocking the form submission.
Payment Gateway Conflicts
Some payment gateways, particularly older PayPal integrations or regional processors, expect specific address fields to be present. If you have removed the 'State' or 'Postcode' fields via your custom code, the payment gateway API might reject the transaction. Always test your checkout flow with real transactions (using test mode) after making any field modifications to ensure compatibility with your payment processors.

Conclusion
Creating a high-converting checkout experience requires moving beyond the default WooCommerce template. Whether you choose to write custom PHP functions to strip away unnecessary fields or deploy a robust field editor to manage complex conditional logic, the goal remains the same: reduce friction and capture only the data you actually need. Start by auditing your current checkout flow, removing every field that does not directly contribute to order fulfillment, and testing your changes rigorously. For a visual, code-free way to manage this process, check out the Checkout Fields Manager for WooCommerce to take full control of your store's conversion point.
FAQ
- how to create custom checkout page in woocommerce?
- You can create a custom checkout page by using a dedicated field editor plugin to drag-and-drop fields visually, or by adding custom PHP filters to your theme's functions.php file to modify the $fields array directly. The plugin method is safer for most users as it avoids syntax errors.
- how to add custom field in woocommerce checkout page?
- To add a custom field, use the 'woocommerce_checkout_fields' filter hook in your code. You define the field type (text, textarea, select), label, placeholder, and required status within the array structure, then return the modified fields array to be rendered on the frontend.
- how to make custom checkout page in woocommerce?
- Making a custom checkout page involves overriding the default template or using hooks to restructure the form layout. You can reorder fields by changing their 'priority' value, hide sections like shipping if they are irrelevant, and inject custom HTML using action hooks like 'woocommerce_before_checkout_form'.
- how to add additional custom fields into woocommerce checkout page?
- You add additional fields by appending new keys to the billing or shipping arrays within the checkout fields filter. For example, adding $fields['billing']['my_custom_field'] allows you to capture specific data like VAT numbers or delivery instructions during the checkout process.
- does removing checkout fields improve conversion rates?
- Yes, reducing the number of required fields significantly lowers cognitive load and form abandonment. Every field you remove that is not strictly necessary for payment or delivery increases the likelihood that a customer will complete their purchase.
- can i use a page builder for the woocommerce checkout?
- While you can use page builders, the checkout page requires specific WooCommerce session handling and AJAX scripts that builders often strip out. It is generally safer to use the default checkout template and customize it via hooks or a dedicated field manager plugin.
- how do i save custom checkout field data to the order?
- WooCommerce automatically saves standard billing and shipping fields. For custom fields added via filters, you must hook into 'woocommerce_checkout_create_order' to ensure the data is saved to the order meta data so it is visible in the admin panel.
This article is part of our WooCommerce checkout topic hub, where the related plugins and guides live together.